


Penetration testing tips for your Netscaler
When working on Netscaler implementation projects, most of which tend to be internet-facing, one aspect that most organisations always perform is a penetration test. Having been through a number of these over the years, I thought it would be a good idea to share my experiences and some of the common aspects that get highlighted, to enable you to “pass first time” without having any remedial actions to work through and costly re-tests to perform.
A good place to start is to work through the “Securing Netscaler” Citrix white paper available here (PDF).
What to test? Internal vs External
The Netscaler has a number of IPs (NSIP, SNIP/MIP, Access Gateway VIPs etc) so what should you test against? The answer may well depend on corporate policy, but I usually test the internet-facing Access Gateway VIP and the management interface (NSIP). I also usually include StoreFront in any internal tests as this is an integral component of the overall solution, but I won’t cover StoreFront in this post.
Of course technically “bad guys” can only reach internet-facing IP addresses (as permissioned by your external firewall) but I recommend including internal-facing IPs for any DMZ-hosts to understand your exposure should another DMZ host get compromised (as your attacker can now potentially access internal IPs so the external firewall rules no longer protect you)
Preparing for your test
Management tools
- Remove unnecessary management tools (telnet and FTP are considered insecure so should always be disabled). Also remove SNMP if your Netscalers are not being monitored or managed by an external monitoring service.

- Ensure that “Secure access only” is selected to force SSL access to the GUI
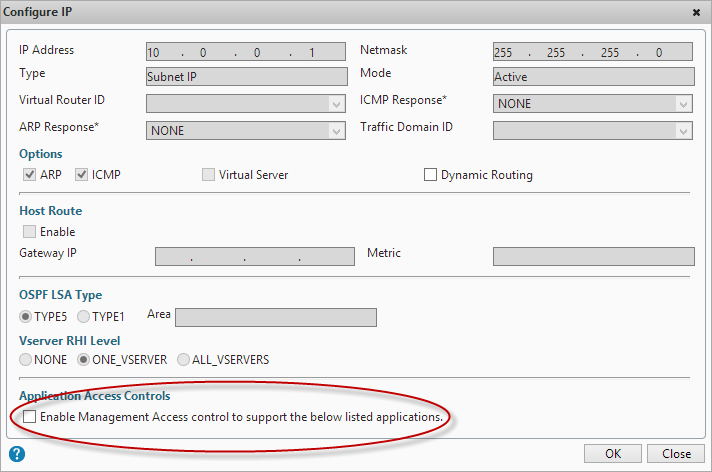
- Ensure that management applications are only available on an internal IP (NSIP or SNIP). Open the IP properties for the IP addresses that won’t be used for management and untick “Enable management access”
Authentication
- Change the default nsroot password to something long (obvious you’d think but you’d be amazed how many Netscalers I’ve seen that I can just log straight into using the default credentials!)
- If you have set up integrated AD authentication via LDAP for administrative access to the GUI, ensure that you have protected access using a filter group, otherwise anyone with a valid AD account will be able to access your Netscaler GUI (although they won’t be able to make any changes, it’s still not a good idea them having this access!)
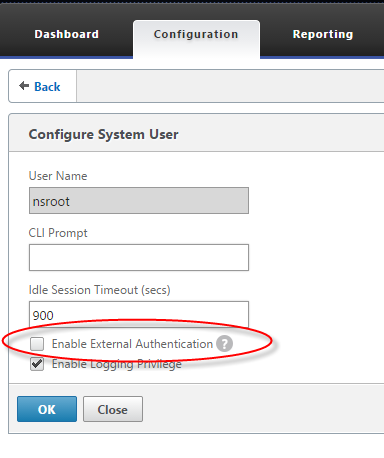
- If you have LDAP authentication bound globally for AD integrated console access, ensure that your local nsroot account on the Netscaler is not enabled for external authentication, otherwise someone could create an AD account called “nsroot” with their own password and login with it gaining full admin rights (thanks to Johannes Norz for this tip)
- If you are using LDAP authentication (and the majority of Netscaler Gateway users are, as they have Active Directory back ends) ensure you are using LDAPS (TLS or SSL) to prevent credentials being sent unencrypted over the wire
Other tips
- Whitelist the tester’s source IP address/ranges on any IPS, WAF or other perimeter protections you have so that their tests don’t get blocked before they reach your Netscaler, or trigger a general panic that you are actually being attacked!
SSL Ciphers
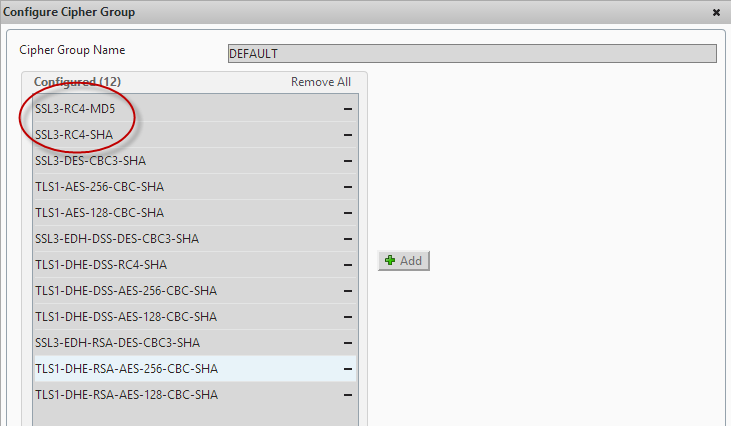
When you create any SSL or Netscaler Gateway VIPs the Netscaler always uses the DEFAULT group of SSL ciphers. Unfortunately this includes an RC4-based Cipher which frequently gets flagged during penetration tests.
For all IP and VIPs that will be tested that uses SSL (including the NSIP and any management IPs) we need to change the ciphers from DEFAULT to HIGH to ensure only ciphers that are considered secure get utilised. Note that all modern browsers support these HIGH security ciphers however if you have users running very old operating systems and browsers you may wish to verify they support these ciphers before making this change.
Netscaler Gateway VIPs
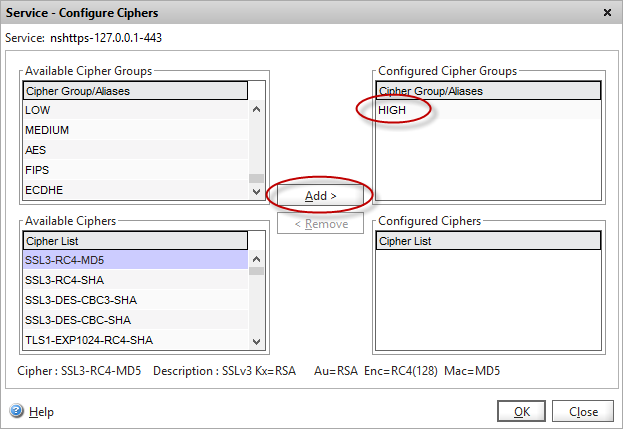
For Netscaler Gateway VIPs, change the cipher group using the “Certificates” tabs on the virtual server then choose “Ciphers”
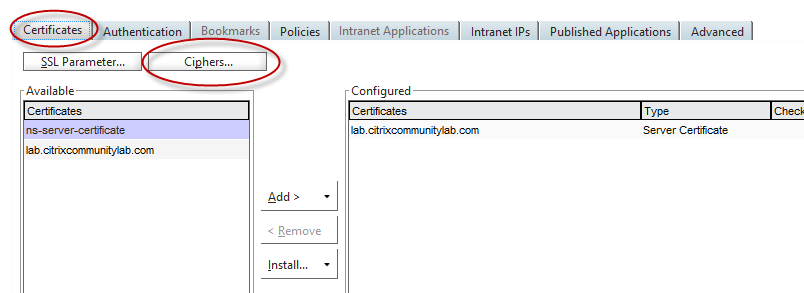
Remove the “DEFAULT” group, and choose HIGH from the list
Management console
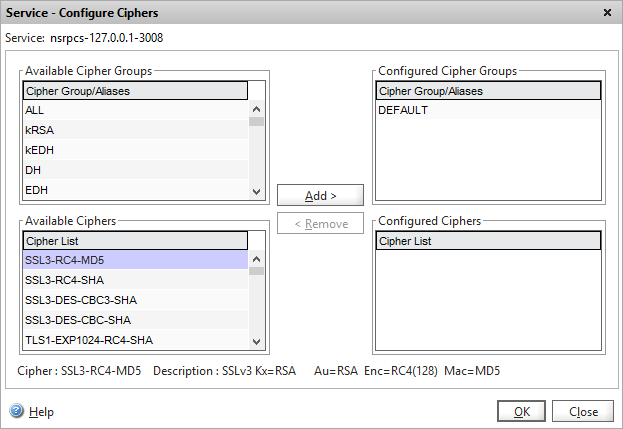
The management console (port 443), Secure Java port (3008) and HA synchronisation port (3009) all utilise SSL certificates so also needs the HIGH cipher group applying if these are likely to be included in your test.
To find these services, navigate to Traffic Management -> Load Balancing and choose “Internal Services” from the Actions menu.
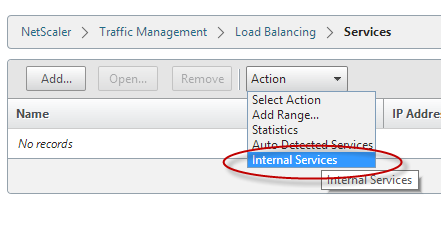
You will then see a list of all the internal management services configured.

Select each one, and follow the same procedure as for the Netscaler Gateway VIP to change the cipher list. Note that you will see a group of duplicate services listed against each IP address that you have management tools enabled on (by default this is only the NSIP)
SSH Ciphers
Changing the Ciphers on the SSH Daemon is a little more involved as it runs inside the BSD shell so you can’t do it from the Netscaler GUI.
From an ssh command prompt, edit the /etc/ssd_config file in vi
The format of this file is documented here. To specify which Ciphers the SSH daemon should use, append a line containing a comma separated list of the ciphers to the config file. e.g.
Ciphers aes128-ctr,aes192-ctr,aes256-ctr
SSL renegotiation/BEAST/BREACH attack
TLS 1.0 contains a weakness that can be exploited known as BEAST or BREACH attack. If you have TLS 1.0 enabled then you need to disable SSL renegotiation to prevent exploitation of this weakness (or enforce TLS 1.1)
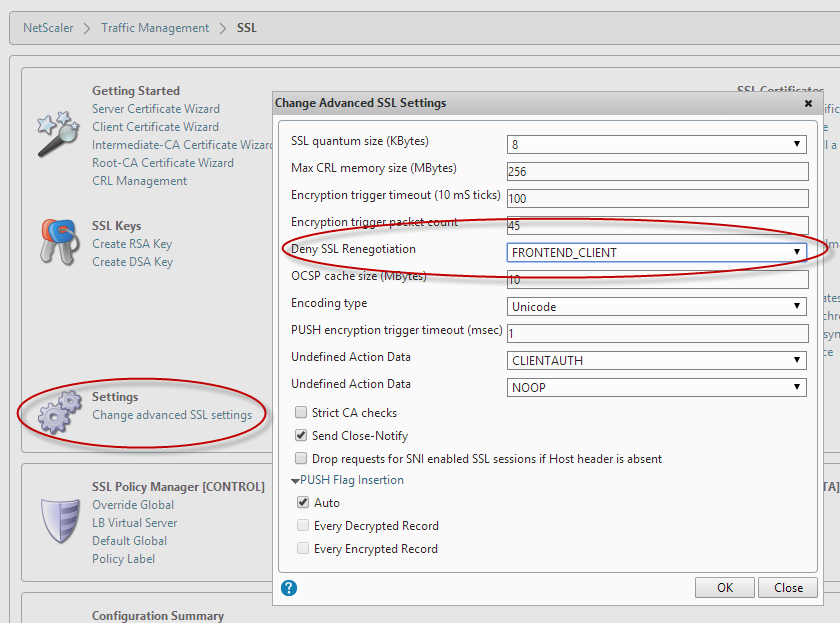
In the SSL configuration page, choose “Change advanced SSL settings”
Disabling SSL renegotiation
In the settings window, set the “Deny SSL Renegotiation” to “FRONTEND_CLIENT”
SSLv3 “Poodle” vulnerability
To prevent clients using the (now compromised) SSLv3 protocol, you should disable the protocol in the “SSL parameters” page on the SSL Virtual server
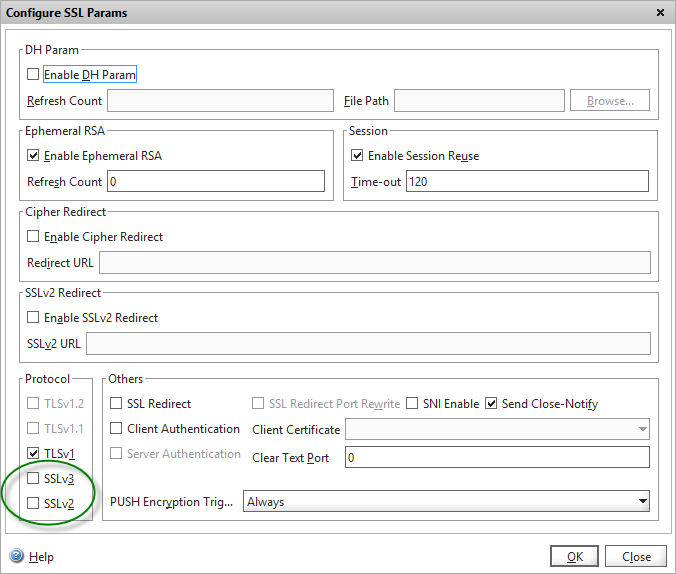
Note: disabling SSLv3 will prevent IE6 clients from connecting
Default internal SSL certificate
Out of the box the Netscaler uses a self-signed certificate against a number of SSL-protected services:
- NSIP management interface on port 443 (labelled as nshttps-127.0.0.1-443 in the services list)
- SSH service on port 21 (doesn’t not appear in the services list as it uses a ssh daemon running inside BSD and not the Netscaler kernel)
- Secure Java management interface on port 3008 (labelled as nsrpcs-127.0.0.1-3008 in the Services list)
If you are having a test performed that hits an internal IP or management IP it’s likely that several issues will get flagged against all of the above ports that are using the default self-signed certificate due to a two possible reasons:
a) Key size
The keysize of the self-signed certificate is 512 to allow the default Netscaler firmware to be utilised in regions where export restrictions on higher-bit length keys apply.
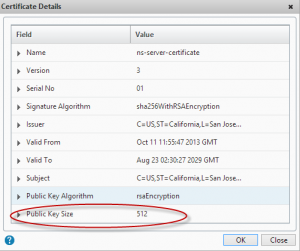
This is generally highlighted as a security risk as the minimum bit length considered secure is 2048 bits.
b) Subject name not matching
Because the Subject name in the self-signed certificate does not match the actual hostname being used to access the Netscaler management interface, this will usually get highlighted in a test. To prevent man-in-the-middle attacks, it is best practice to ensure that SSL certificate Subject names always match the actual FQDN that’s being connected to.
To mitigate both these items you can request an SSL certificate that has a Subject name that matches the administrative interface (create a DNS alias if necessary). If cost is a factor you can use an internal Certificate Authority such as AD – the SSL certificates don’t need a full chain of trust as they are only used for administration – although any decent penetration test will flag internally signed certificates too! (although there is no real security risk associated with using them for management – they get flagged to make you aware that browsers won’t trust them without your own CA root being added) You should use a 2048 bit key for the CSR, and then assign the resulting certificate to the various SSL internal management interfaces.
SSL Labs tests
A popular way of testing SSL security is to use the SSL Labs suite of tests – and I recommend you put your public-facing VIPs through this test before performing any penetration tests to highlight any serious SSL configuration issues.
Note that you’ll never score an A on a VPX appliance due to them not supporting TLS 1.1 or 1.2 in software. You’ll need SDX or MPX hardware with the SSL Cavium cards to support those.
Reconfigure NTP daemon against CVE-2013-5211
Out of the box, the Netscaler NTP daemon can be exploited to participate in an DDoS attack against remote hosts using amplification of the REQ_MON_GETLIST feature of NTP. To reconfigure the out-of-the-box NTP configuration to protect against this, follow the instructions in this KB article.
False positives
Tests against management IPs often detect that OpenSSH is running (usually by connecting to the SSH management interface on port 22) then this can flag up a load of potential unpatched security vulnerabilities as the OpenSSH version reported by the Netscaler (OpenSSL 0.9.7e-p1 25 Oct 2004) is very old.
These are however all false positives, as any OpenSSH vulnerabilities are patched directly in the Netscaler code tree by Citrix, rather than in the OpenSSH BSD package itself which remains at its original version. It would be sensible for Citrix to also patch the version of SSH that get’s returned to avoid these red herrings!
Advanced security
You can probably stop here to satisfy the majority of penenetration tests, however should you be working in government or other highly secure environments then there are some additional steps you can perform to further lock down your Netscaler.
Disable logins via SSH
By default, you can authenticate onto a Netscaler via SSH using any configured local or AAA user account. In highly secure environments you might wish to disable this authentication and switch to using Public Key authentication using a private and public key pair. The process of doing this is on the Netscaler documented here.
Setup ACLs
First a word of caution – incorrect use of ACLs can result in you “orphaning” your Netscaler from the network, so be very careful when applying them. I generally don’t use ACLs by default as they add another item to be maintained in addition to your firewall rules, but for highly secure environments you may need to implement them.
The “basic ACLs” only allow you to create DENY rules, so we need to use Extended ACLs to achieve what we need.
First, setup an ACL ALLOW rule for your management traffic. If the Netscaler will always be managed from a specific IP this is easy, but this is rarely the case so you might have to restrict traffic to a particular subnet. Remember to include the ports required by Java
Then create ALLOW rules for any HA or GSLB replication traffic between Netscalers.
Create ALLOW rules for all the outbound connections from the SNIPs (LDAP, DNS, NTP, ICA/CGP etc) .
Create an ALLOW rule for traffic arriving from your firewall into your public-facing VIPs on the relevant ports (80/443)
At this point save your configuration in case you’ve missed anything and the next step orphans your device.
Finally you can create a DENY rule blocking all other traffic. If you still have access, great. If not, you will need to forcibly restart the Netscaler to revert back to the saved configuration and regain access to work out what ALLOW rules you missed.
Have you been through a Netscaler penetration test that has raised issues not covered here? I’d love to hear about them in the comments below so I can get them included.
History
22/01/14 – Added SSL renegotiation config change
24/10/14 – Added SSL v3 “Poodle” workaround
20/11/14 – Added NTP lockdown to protect against CVE-2013-5211
24/03/15 – Added nsroot remote authentication disablement tip
Credits
Thanks to @thegaryhawkins for content review and feedback.
Thanks to Johannes Norz for the nsroot remote hijack tip
Leave a comment
You must be logged in to post a comment.
