
First look: XenApp and XenDesktop 7.5 – part two (creating the first site)
In part one of this blog series I examined the new features in XenApp 7.5, and the installation process.
In this part I’ll now continue and create our first XenApp site.
In part three I cover creating my master template image
In part four I create a machine catalog to provide some XenApp hosting servers ready to publish my applications from
In part five I create the delivery group to publish applications and dekstops to end user
In Part six I examine the new policy filtering options
In Part seven I examine some of the Load balancing and fail-over changes
As with all images on this blog, click on the screenshots to enlarge them
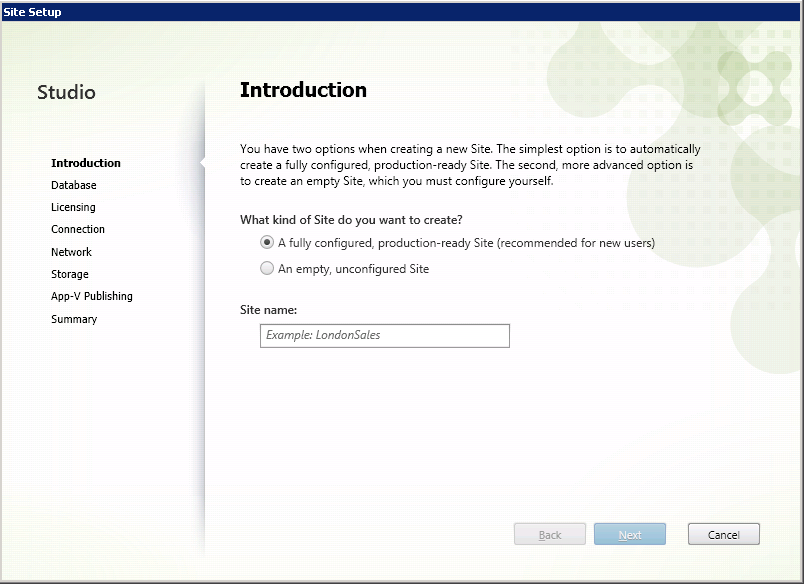
Opening the Studio console we are presented with three options:
- Deliver applications and desktop
- Enable users to remotely access their physical PCs
- Connect this delivery controller to an existing site
As this is my first delivery controller, I’ll choose the first option.

This opens the site setup wizard. This takes you through the entire process of setting up your first site gathering all the essential data in easy to follow steps.
Long gone are the days where you had to provide all your configuration details to the Metaframe installer up-front, and if you got one thing wrong and it couldn’t join the farm, it would completely un-install everything and you had to start again from scratch.
My first choice is whether to create an empty or fully configured site. The first sounds more appealing so I choose that one.
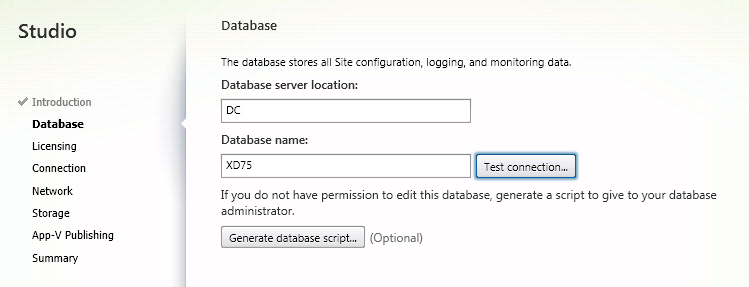
As with most installations these days, the first question is where to store the configuration data (aka the data store). I choose an existing SQL server in my environment, and click on Test Connection.
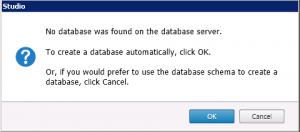
As expected, the installer detects there is no database present and prompts me to create one automatically, or if I want the raw SQL if I don’t happen to have DBA rights to create one myself.
The next stage is to configure licensing. Citrix give you a nice 30-day free trial option if you don’t configure any license server.

I pointed the wizard at my existing license server and got the following message:

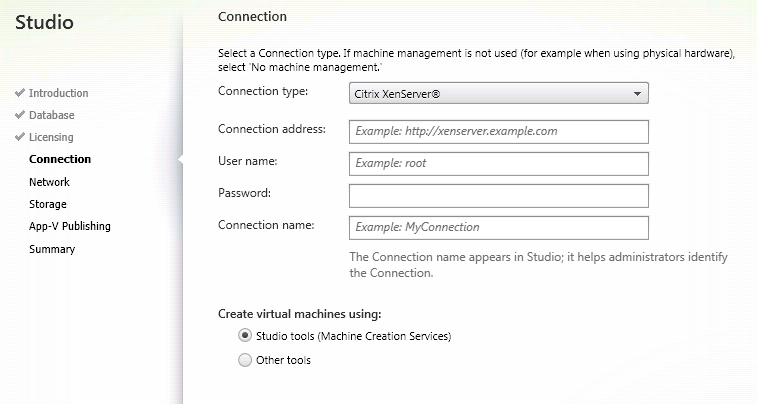
As I trust the server, I choose “Connect me”. I am now asked to configure the hypervisor I’m using.
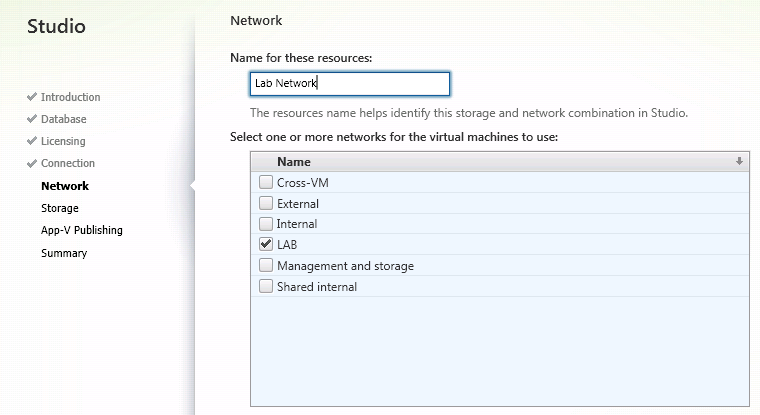
After entering my XenServer pool details, I’m asked which network the VMs MCS should use.
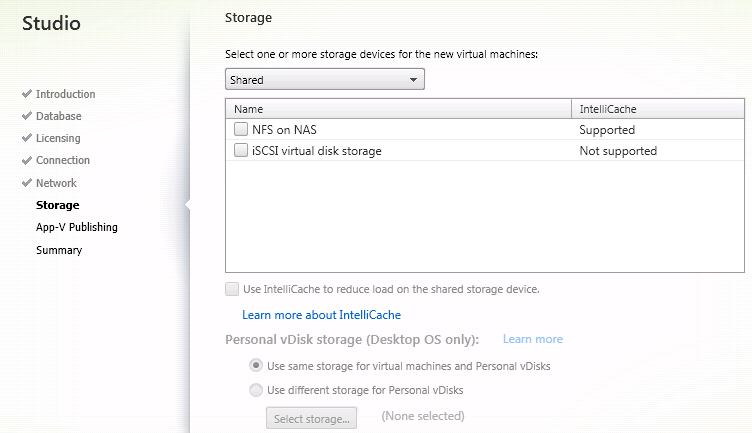
And then which of my two storage repositories I want to use. Conveniently, the installer shows me which SR’s I can use Intellicache on, should I wish to utilise this feature to offload IO from my storage.
I can then configure the App-V integration to allow publishing of App-V delivered apps. As I don’t have an App-V management servers, I skip this step.

A summary page shows me all the choices I’ve made so far.

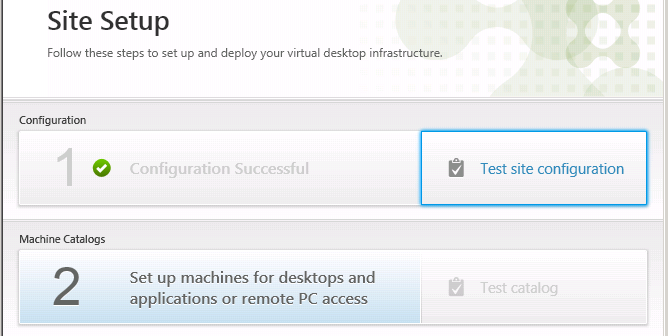
I click finish and let the installer create the site database.
Step one complete.
In the next part of the series, I prepare my XenApp 7.5 template image so I’m ready to create my first machine catalog.
Leave a comment
You must be logged in to post a comment.
