How I virtualised my Smarthome controller
A slight break from the norm today, although still vaguely virtualisation-related.
Background
A few years ago, when we rennovated our house, I installed a Smarthome system powered by Idratek. This controls all aspects of heating, lighting and security in our house.
The master house controller software ran on a Dell PowerEdge server I had been using as a media and NAS server, running under Windows 2003 server OS. I had been meaning to replace this server since moving all my data onto a QNAP TS-410 NAS appliance about a year ago, as this uses a fraction of the 160W that the Dell server consumes.
Well the server finally gave up the ghost with the heatsink on the motherboard snapping, and CPU overheating. Although the system thermal overload prevented permanent damage to the CPU, it highlighted the fact that I should really accelerate it’s replacement.
New hardware
I wanted to avoid buying a new beefy server for home/lab use as I’ve just invested in a new lab server, so the requirements were quite specific:
- Low power
- Silent (or as near to silent as possible- it’s installed in my daughters wardrobe)
- Capable of running a hypervisor
- Small footprint
- Cheap
The best fit appeared to be the HP Microserver: low power (about 35W in use), small footprint and almost silent in operation, and just over £200+vat
Hypervisor choice
Given my lab server already runs Xenserver, plus XenServer does not provide any audio or USB device support, I used the free ESXi hypervisor. The install wasn’t quite as straightforward as I hoped as the Microserver has no CDROM/DVD drive installed, so I had to create a bootable USB drive with the ESXi installation files on. This process warrants it’s own blog post at some point as it was quite involved.
USB provision
Once I had ESXi installed, I created a Windows 2008R2 Virtual Machine with 2Gb RAM and a single CPU.
Cortex, the Idratek control software requires two pieces of hardware to function:
Sound card
The sound card is used for text-to-speech announcements via the Microsoft Speech API, and detecting voice commands via the mic input (although I don’t use this functionality as I didn’t install ceiling microphones, and walking to the control panel to speak a command takes as long as punching a couple of buttons)
I have a nice English voice installed (Cepstral Millie) who’s tones announce the days minimum and maximum temperature, and any other alerts I should be aware of.
Because the previous hardware was a Dell server, I had already installed a USB sound card, so could re-use this on the Microserver.
Idranet PCU interface
The hardware side of the Smarthome uses a propriatory network running over CAT5, with an interface module to connect it to the control PC via USB. I was previously using an older RS232-based interface, however I replace this with the USB version due to the Microserver having no serial port.
USB device provision to VMs
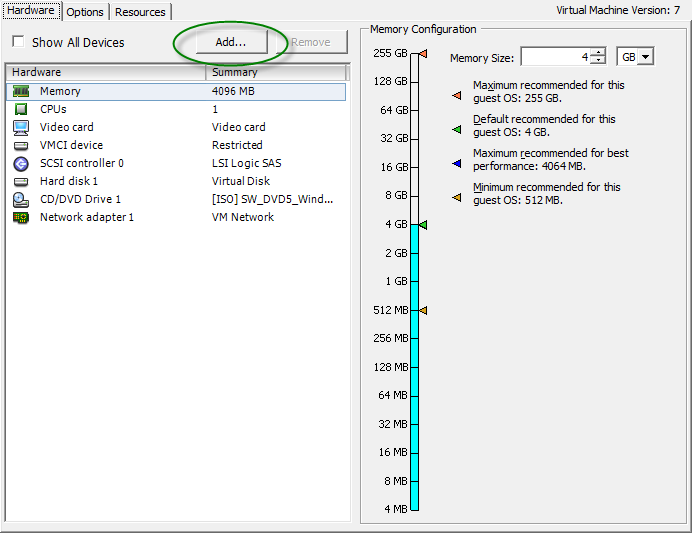
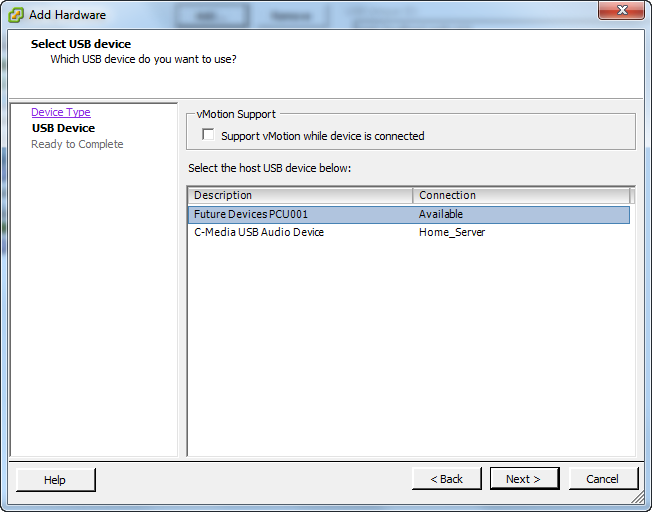
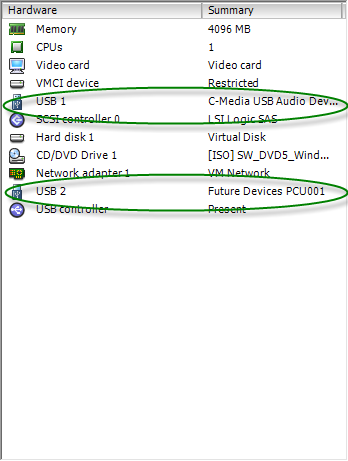
To make the USB devices available inside the VM, you need to add a USB controller, and then the individual USB devices.
Open the VM Properties (whilst it’s powered off) and choose “Add” from the hardware tab.
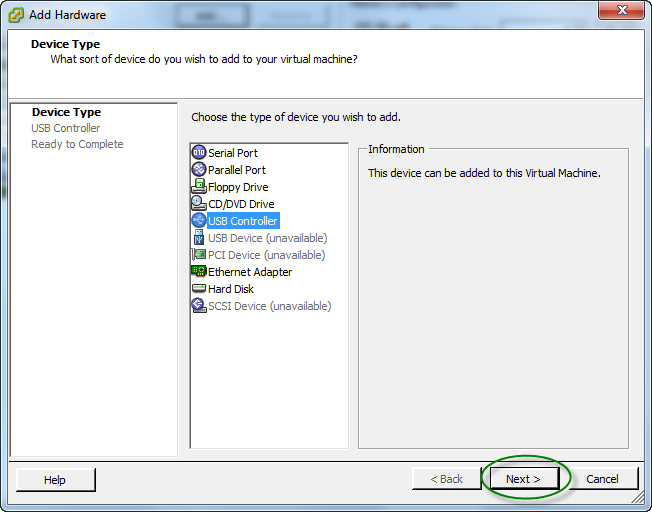
Choose “USB controller” from the list of available hardware.
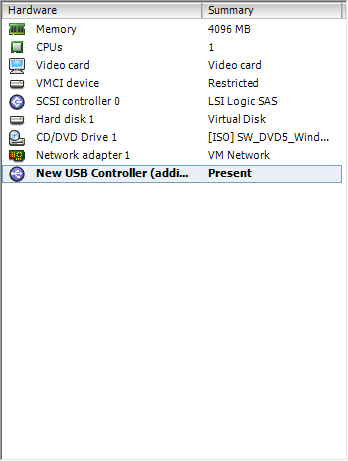
Once this has been added, you can then Add individual USB devices that are connected.
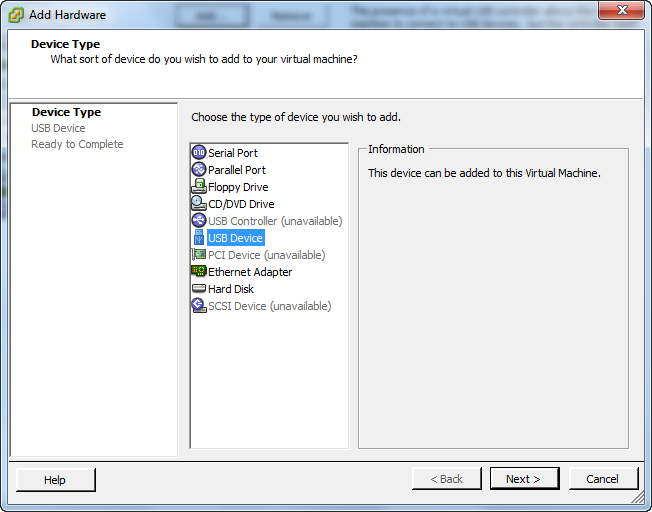
Click Add again, and choose USB Device.
Choose the USB device you want to add. In the screenshow below, I had already added the C-Media USB Audio device (hence why it was showing as already connected).
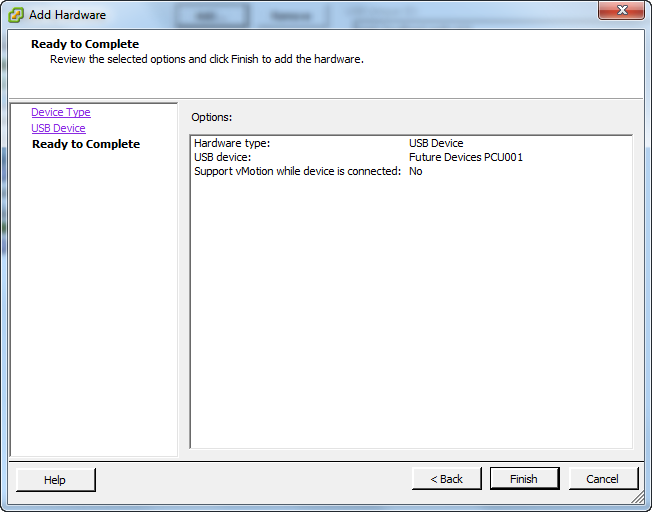
I’m using a single host, so won’t be VMotioning between hosts, so no need to check that option. Accept the confirmation, and the device will get added.
Drivers
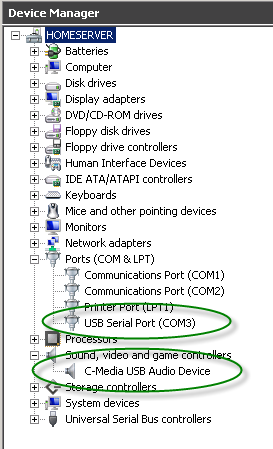
The C-Media sound card gets automatically detected by Windows, however you need to download and install the drivers for the PCU001 device from Idratek website. This adds a USB COM port to windows. There are some advanced settings that have to be configured on the USB drive to correctly interface with the PCU and Idranet protocol.The driver and instructions can be found here.
When you boot the VM, these will then get auto-detected by the plug-and-play service, and corresponding drivers installed.
The final step is to configure the Cortex software to use COM3 (or whatever COM port your USB driver gets installed as).
This is done from the Setup-> RS232 comms menu.
Auto-starting Cortex
VM Auto-start
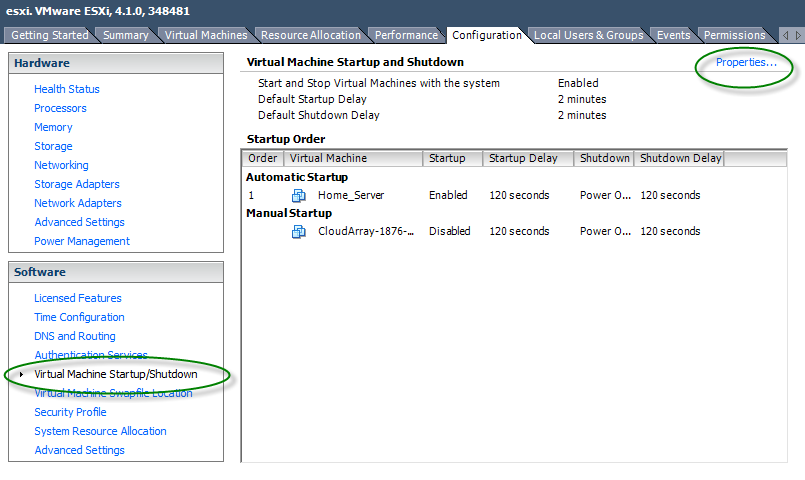
First, we need to configure our VM to auto-start when ESXi starts up. This is done from the ESXi servers configuration tab under “Virtual Machine Startup/Shutdown”. Click on Properties in the top-right hand corner to edit the default (manual startup)
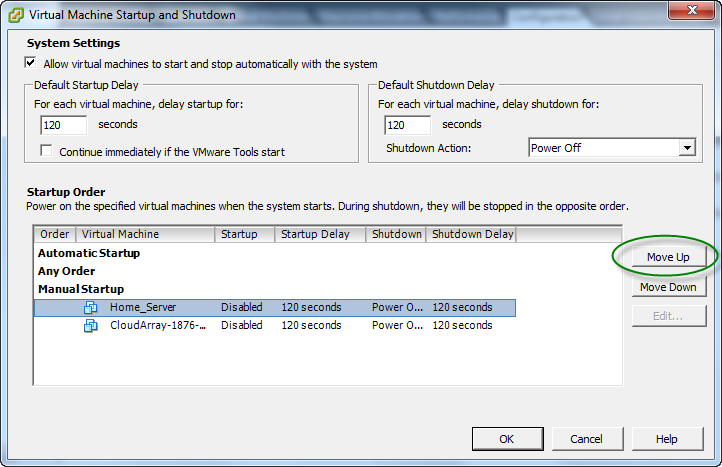
Choose the server from the list of installed VMs (I only had two) and then choose “Move up” to move it into the “Automatic startup” section.
Start-up is now enabled, and the VM will automatically be powered on when ESXi starts up.
User auto-login to Windows
Cortex does not run as a Windows service, it’s a regular application, so you need to configure your OS to auto-logon with a specified user account.
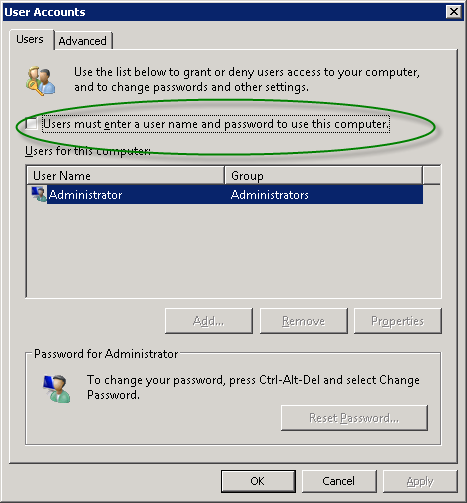
This can be done by running the following command as an administrator (on Windows 7, or Server 2008R2 OS)
This opens a configuration window. Uncheck the option “users must enter a username and password to use this computer”. If you want to use a user other than administrator, you can select them from the list.
This will now auto-logon to windows when the VM starts up, and as Cortex adds itself to the startup folder when it installs, will auto-run itself at boot-up.
And that’s about it. We now have a virtualised control server, auto-booting, communicating with the outside world via USB.
The future…
My next challenge is to completely remote the COM port over TCPIP so I can run Cortex “in the cloud” without having a local server in the house.
Leave a comment
You must be logged in to post a comment.


